Customer's Challenge
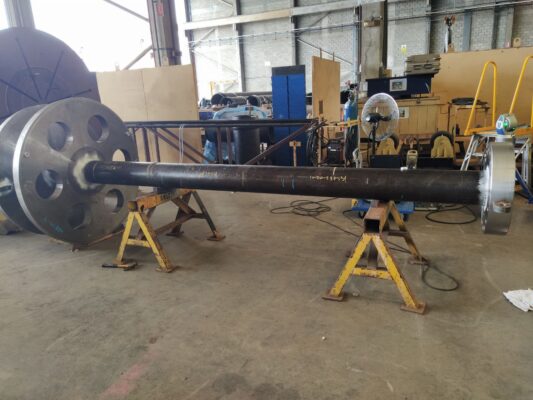
A subsea equipment manufacturer needs support from Coordinate Measuring Machine (CMM) to provide the Geometric Dimension & Tolerance (GD&T) for machining and assembly of a critical component. The component has a piston head which is 1.6m in diameter and the entire workpiece spans around 4m in length as shown figure 1.
A subsea equipment manufacturer needed Geometric Dimension & Tolerance (GD&T) verification for a critical component—a piston head measuring 1.6m in diameter and spanning 4m in length. Due to the lack of a suitable Coordinate Measuring Machine (CMM) in-house, the client had been transporting the workpiece to third-party CMM laboratories. This process was not only costly due to logistics but also caused downtime, as labs often operated on a “first in, first out” basis.
Solution
To streamline the production process and avoid costly delays, the FARO Vantage laser tracker was selected for its precision and portability. The laser tracker’s ability to perform on-site dimensional verification allowed our client to stay on schedule while manufacturing multiple components. Here’s how the FARO Vantage laser tracker was used at various production stages:
- Pre-machining Verification:
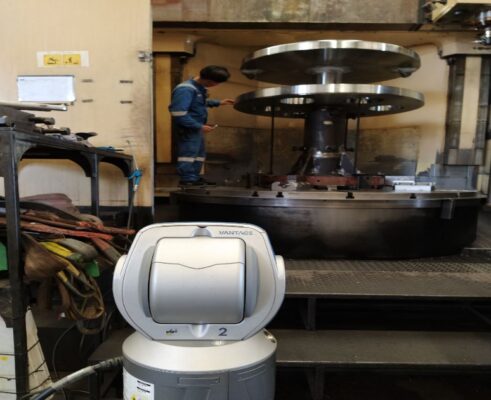
The laser tracker was employed to check the bottom flange before the final machining cut. By connecting the laser tracker to Spatial Analyzer metrology software, real-time dimensions were generated, providing machinists with accurate “as it is” data before performing the finishing cut. - Alignment Check Between Top and Bottom Flanges:
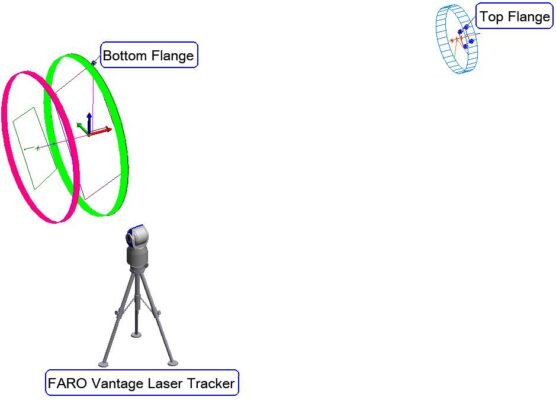
The laser tracker was also used to verify the alignment between the top and bottom flanges. This allowed the product specialist to monitor trends, refine the welding process, and ensure the component met the required tolerances. - Acceptance Report:
Upon completion, an acceptance report was generated using the FARO Vantage laser tracker, providing accurate and detailed GD&T data via Spatial Analyzer software.
Benefits
By utilizing the FARO Vantage laser tracker, the client achieved significant cost savings by eliminating the need for third-party laboratory services. The portability of the laser tracker allowed dimensional measurements to be taken while the workpiece remained mounted on the CNC machine, improving workflow efficiency and reducing downtime. Additionally, the ability to conduct back-to-back measurements across different production stages enhanced overall productivity, completing the entire production process within just 5 days.


