Customer's Challenge
We were approached to service a critical component of a diving vessel—the diving bell trunk. This short man-way connects the entry locks (wet pots) to the diving bell, allowing divers to transit from the bell to a subsea work site. Since this structure interconnects the diving bell and chambers in deep sea environments, it is essential that the connecting flange surfaces remain in optimal condition to prevent leaks when operating under high pressure.
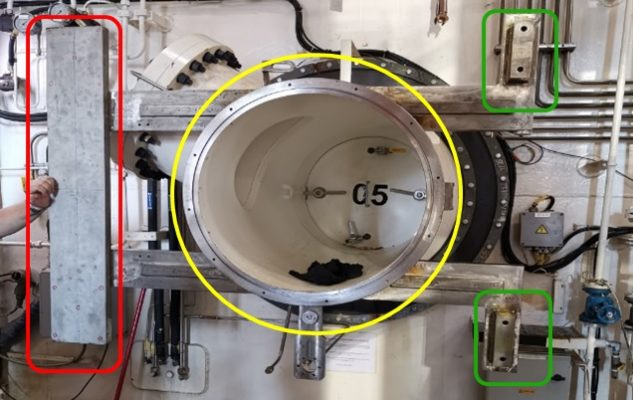
The key focus of this task was to perform flatness and dimensional checks on the bell trunk’s flange (highlighted in yellow) and the gearbox seating faces (highlighted in green and red), as shown in Figure 1.
Solution
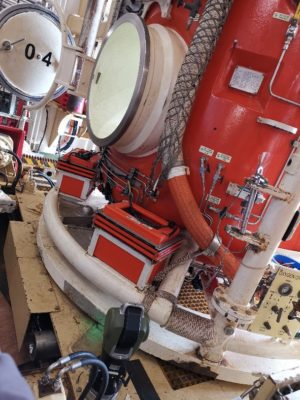
We utilized the API laser tracker OT2, chosen specifically to meet the stringent “10:1” rule, which ensures that measurement uncertainty is well within acceptable limits. The OT2’s Maximum Permissible Error (MPE) of 0.042mm at a 2m range easily fits within the 0.5mm tolerance specified by the client. Additionally, the compact design of the API OT2 allowed it to perform accurately even in the confined space of the site, as shown in Figure 2, and operate efficiently using its built-in battery power supply.
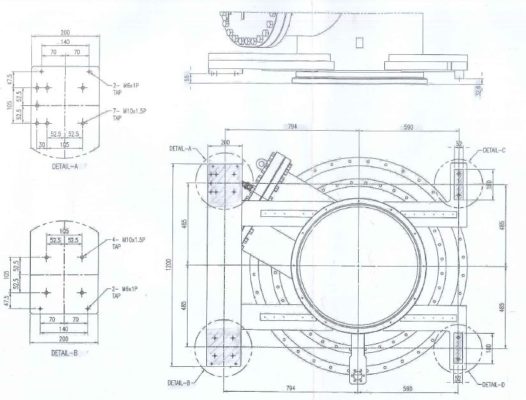
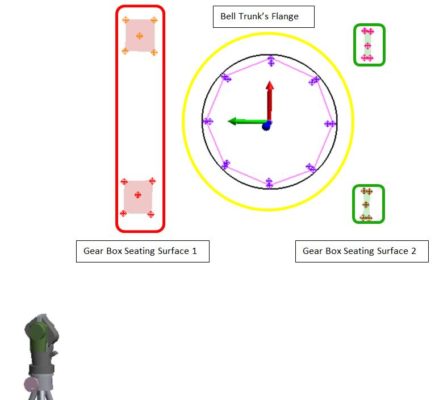
To ensure repeatability and reproducibility (R&R) of the measurements, we marked positions for the Spherically Mounted Retroreflector (SMR) on the structure. Using Spatial Analyzer software, we created a best-fitted plane from the collected points to determine flatness runout, as shown in Figure 4. The software also set up a coordinate reference for analysis based on the engineering drawings (Figure 2).
Benefits
The high-precision measurements from the laser tracker allowed us to align an in-situ linear milling machine with the reference points on the bell trunk. This enabled accurate corrective machining to adjust the runout and offset distance with minimal material removal.
The data collection and analysis were completed in just one day, while the in-situ machining was finished in two days—well within the client’s requirements. This solution ensured optimal performance and prevented any potential leakage in this vital subsea component.
By employing cutting-edge laser tracking technology, we provided an efficient and highly accurate solution to meet the client’s needs.


